I introduced the mechanism behind Textual Inversion in this article:

>-
Textual Inversion (also called embeddings) lets you bake a specific style or concept into a compact file that plugs directly into the text encoder. Because the file is small and standalone, embeddings are easy to share and try — you simply drop one into ComfyUI’s embeddings directory and reference it by name in your prompt.
Now that I’ve studied how it works, this time I’ll show how to actually use an embedding in ComfyUI. I’ll also verify the effect through generation results and compare the difference with and without the embedding.
Work Flow
1. Introduction of ComfyUI
Please refer to this article.
>-
2. Download Your Preferred Embedding
Download from wherever you like and place it in ComfyUI/models/embeddings. The selection is small, but you can also install directly from the ComfyUI-Manager UI.
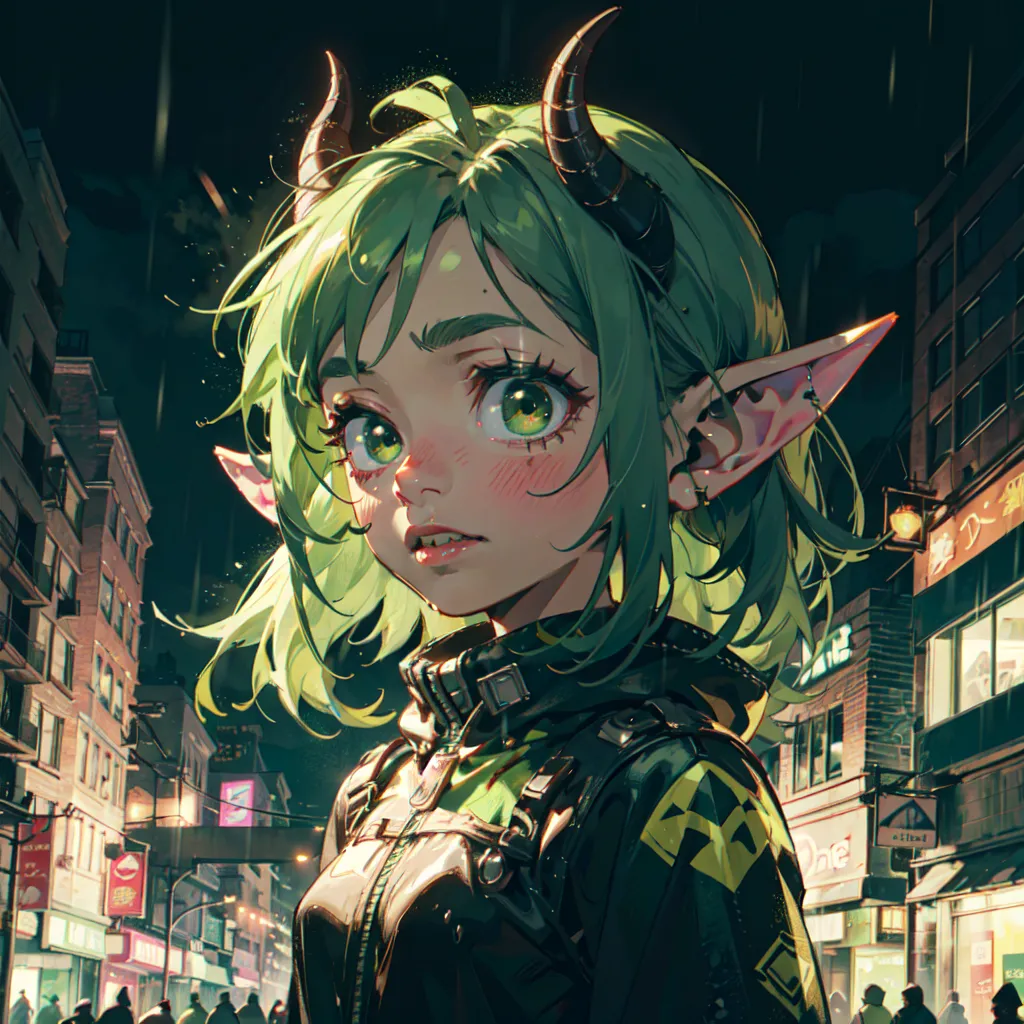
For this example, I borrowed an embedding from the link below that adds a Goblin-style look to the output.
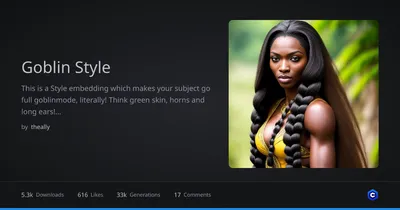
This is a Style embedding which makes your subject go full goblinmode, literally! Think green skin, horns and long ears! Simply throw Style-Goblinm...

3. Choose a Workflow
Since I’m only modifying the prompt this time, any workflow will work fine.
4. Generate
Specify embedding:{embedding_name} in your prompt and generate.
- In my case the filename was
Style-Goblinmode.pt, so I enteredembedding:Style-Goblinmodein the positive prompt.
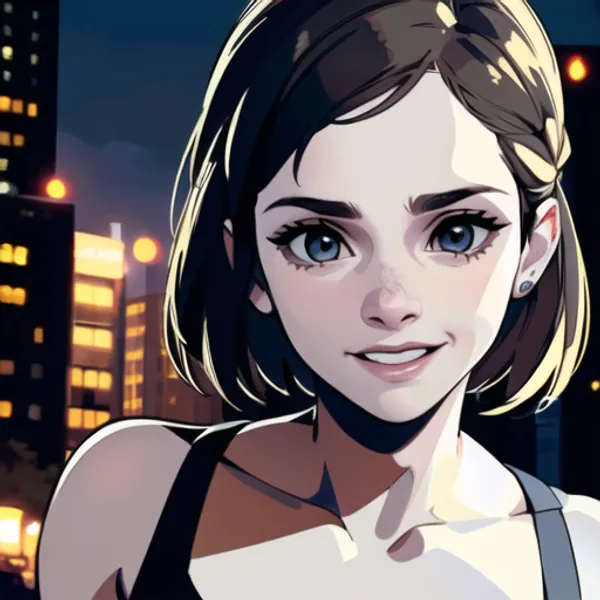
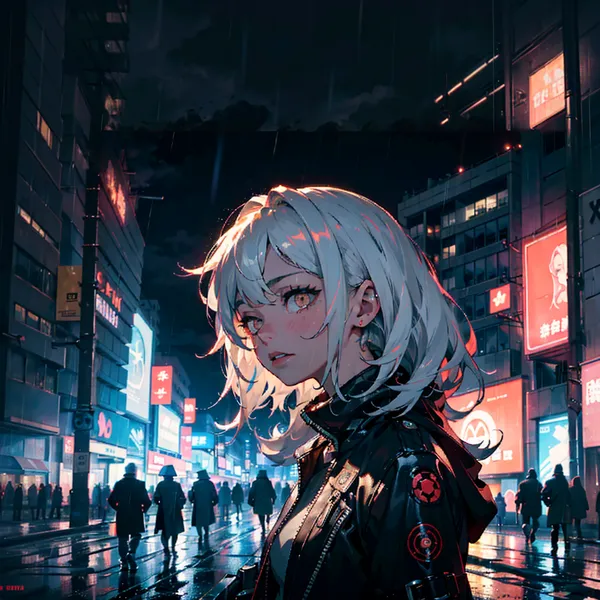
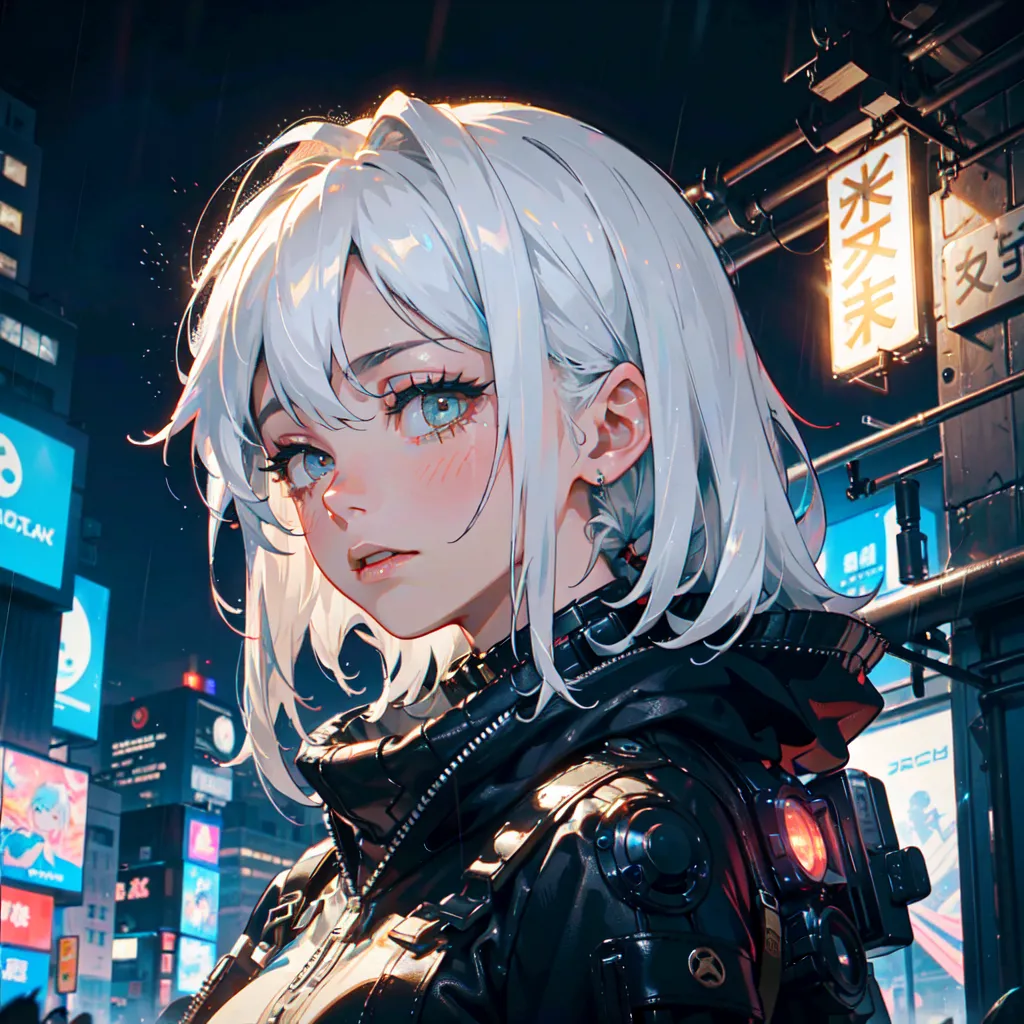
Generation Result
Without embedding
dark sky, rain, midnight, distressed texture, a portrait of a woman, challenging face, cyberpunk city, confident pose,
With embedding
dark sky, rain, midnight, distressed texture, a portrait of a woman, challenging face, cyberpunk city, confident pose, embedding:Style-Goblinmode,
Conclusion
Since I approached this from the paper side, I demonstrated the use of embeddings in the positive prompt. However, embeddings are actually more commonly used in the negative prompt. Well-known ones like EasyNegative (or EasyNegativeV2 now?) are widely used, and it’s known that adding them to the negative prompt can significantly improve image quality. They’re very easy to try, so give that a shot too if you’re interested.
If you want to try other techniques related to image generation, please check out the link collection below.
>-