In this article, I explain detail of Vid2Vid workflow using ComfyUI and usage method. Finally I also post generation result, so please look.
I wrote title and overview of article looking like that for now, but reason I am writing article is just “Because Vid2Vid went relatively well so I want you to see it!”.
Honestly just posting generated video was fine, but since I created workflow of ComfyUI, I will introduce its usage method simply.
Availability of Workflow
Since there might be people saying “Don’t need explanation”, I put workflow first.
Explanation of Workflow
For model and post-processing, I mainly incorporate below.
- Model: AnimateDiff(V3) + ControlNet + IPAdapter(FaceID)
- Post-processing: FaceDetailer + Upscale(ESRGAN) + Frame Interpolation
Regarding explanation of each method and usage method in ComfyUI etc., I think they are summarized roughly below, so please read if you like.
-
Stable Diffusionガイド:画像生成に役立つリンク集
>-
-
Stable Diffusionガイド:動画生成に役立つリンク集
>-
-
Stable Diffusionガイド:論文読みリンク集
Stable Diffusion関連の論文解説記事のリンク集。画像生成・動画生成の基礎モデルから応用技術まで論文ベースで解説。

Usage
1. Installation of ComfyUI
Introduce ComfyUI by either method below. Those already introduced please update ComfyUI to latest version too.
Method 1: Introduce ComfyUI directly
I think this is good for beginners.
>-
Method 2: Install via StabilityMatrix (Integrated Environment)
>-
2. Import of Workflow
Please download from link destination below and import.

3. Installation of Extension
Execute Install Missing Custom Nodes via ComfyUI-Manager, or install following extensions manually.
Required
-
GitHub - ltdrdata/ComfyUI-Impact-Pack: Custom nodes pack for ComfyUI This custom node helps to conveniently enhance images through Detector, Detailer, Upscaler, Pipe, and more.
Custom nodes pack for ComfyUI This custom node helps to conveniently enhance images through Detector, Detailer, Upscaler, Pipe, and more. - ltdrdata/ComfyUI-Impact-Pack
github.com -
GitHub - Fannovel16/comfyui_controlnet_aux: ComfyUI's ControlNet Auxiliary Preprocessors
ComfyUI's ControlNet Auxiliary Preprocessors. Contribute to Fannovel16/comfyui_controlnet_aux development by creating an account on GitHub.
github.com -
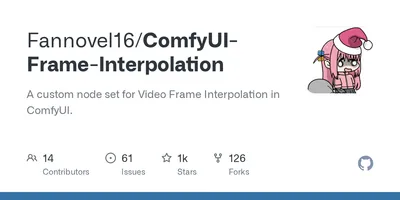
GitHub - Fannovel16/ComfyUI-Frame-Interpolation: A custom node set for Video Frame Interpolation in ComfyUI.
A custom node set for Video Frame Interpolation in ComfyUI. - Fannovel16/ComfyUI-Frame-Interpolation
github.com -
GitHub - cubiq/ComfyUI_IPAdapter_plus
Contribute to cubiq/ComfyUI_IPAdapter_plus development by creating an account on GitHub.
github.com -
GitHub - Kosinkadink/ComfyUI-Advanced-ControlNet: ControlNet scheduling and masking nodes with sliding context support
ControlNet scheduling and masking nodes with sliding context support - Kosinkadink/ComfyUI-Advanced-ControlNet
github.com -
GitHub - Kosinkadink/ComfyUI-AnimateDiff-Evolved: Improved AnimateDiff for ComfyUI and Advanced Sampling Support
Improved AnimateDiff for ComfyUI and Advanced Sampling Support - Kosinkadink/ComfyUI-AnimateDiff-Evolved
github.com -
GitHub - Kosinkadink/ComfyUI-VideoHelperSuite: Nodes related to video workflows
Nodes related to video workflows. Contribute to Kosinkadink/ComfyUI-VideoHelperSuite development by creating an account on GitHub.
github.com -
GitHub - kijai/ComfyUI-KJNodes: Various custom nodes for ComfyUI
Various custom nodes for ComfyUI. Contribute to kijai/ComfyUI-KJNodes development by creating an account on GitHub.
github.com


Optional (Convenient ones)
-
GitHub - rgthree/rgthree-comfy: Making ComfyUI more comfortable!
Making ComfyUI more comfortable! Contribute to rgthree/rgthree-comfy development by creating an account on GitHub.
github.com -
GitHub - pythongosssss/ComfyUI-Custom-Scripts: Enhancements & experiments for ComfyUI, mostly focusing on UI features
Enhancements & experiments for ComfyUI, mostly focusing on UI features - pythongosssss/ComfyUI-Custom-Scripts
github.com

4. Manual Installation of Library
Since python library necessary for FaceID is not installed by error, install manually.
Download wheel of insightface from link below, then hit install command with pip.
Contribute to Gourieff/Assets development by creating an account on GitHub.
# In case of standalone version, replace python command with path to execution binary of pythonpython -m pip install (path to downloaded whl) onnxruntime onnxruntime-gpuReferred video:
5. Download of Necessary Models
Exclusive models are necessary download for IPAdapter, ControlNet, AnimateDiff respectively. Download necessary ones from repository etc.
-
lllyasviel/ControlNet-v1-1 at main
We’re on a journey to advance and democratize artificial intelligence through open source and open science.
huggingface.co -
GitHub - cubiq/ComfyUI_IPAdapter_plus
Contribute to cubiq/ComfyUI_IPAdapter_plus development by creating an account on GitHub.
github.com -
guoyww/animatediff at main
We’re on a journey to advance and democratize artificial intelligence through open source and open science.
huggingface.co


6. Create Video to become Input
Since AnimateDiff does not support high fps video (blurs), please convert video to 8fps. Using ffmpeg etc. is easy.
7. Generate
After that, tweak various parameters and generate.
Since I think error comes out if settings or models are missing, please try executing while fixing appropriately.
Tips
- Can generate quickly if changing to form using AnimateDiff-Lightning or LCM-LoRA etc.
- FaceID is not needed if just generating video
- Please switch ControlNet according to original video or video you want to generate
- Lineart, SoftEdge, and Canny etc. if line drawing/anime style
- Depth if depth is important
- OpenPose if movement is important
- etc.
Generation Result
Since I couldn’t paste to Hatena Blog due to relationship of file size/format, Youtube.
Generated nicely isn’t it!!! Although there are points concerned slightly like face not moving and creepy, or arm disappearing occasionally, I end parameter adjustment here due to time constraint.
Since I was doing trial and error for about a week, I can sleep feeling good today. Thank you for reading until end.