Recently, I’ve been tweaking VMs on Proxmox frequently, so I’m leaving a memo of the procedure to create a template VM using Ubuntu’s cloud image. It’s for when I go “How did I do that again…?”, but it might help someone else.
This time, I used Ubuntu 24.04 LTS (cloud image) to create a VM template that can be initialized with cloud-init. I used the GUI on Proxmox, but ultimately also did some detailed settings via config file.
As usual, it’s not quite a “manual”, half of it is like a log. If I feel like tidying it up properly, I’ll make it easier to read later. Probably. Surely. Perhaps…
Procedure
Ref: https://github.com/UntouchedWagons/Ubuntu-CloudInit-Docs
Create VM to convert to Template
Run the following commands on the proxmox host. The image used is Ubuntu 24.04 LTS cloud image (https://cloud-images.ubuntu.com/noble/current).
# Download cloud imagewget -P /root  https://cloud-images.ubuntu.com/noble/current/noble-server-cloudimg-amd64.img
# Resize image as it becomes the disk size when clonedqemu-img resize /root/noble-server-cloudimg-amd64.img 32G
# VM setupvmTemplateId=9000qm create ${vmTemplateId} --name "ubuntu-2404-cloudinit-template" --ostype l26 \    --memory 7680 \    --agent 1 \    --bios ovmf --machine q35 -efidisk0 local-lvm:0 \    --cpu x86-64-v2-AES --socket 1 --cores 2 \    --vga serial0 --serial0 socket  \    --net0 virtio,bridge=vmbr0,firewall=1
# Import imageqm importdisk ${vmTemplateId} /root/noble-server-cloudimg-amd64.img local-lvm
# Attach imported image to VMqm set ${vmTemplateId} --scsihw virtio-scsi-single --virtio0 local-lvm:vm-${vmTemplateId}-disk-1,discard=on
# Set boot orderqm set ${vmTemplateId} --boot order=virtio0
# Add drive for cloudinitqm set ${vmTemplateId} --scsi1 local-lvm:cloudinit
# Destroy image if no longer needed# rm /root/noble-server-cloudimg-amd64.img
Configure cloud-init
For Proxmox, there seems to be two ways: via GUI or via config. However, GUI can only do simple settings, so for complex initialization, Config needs to be adopted.
Note: GUI allows tweaking settings below. But as you see, you can only really tweak user info and IP.
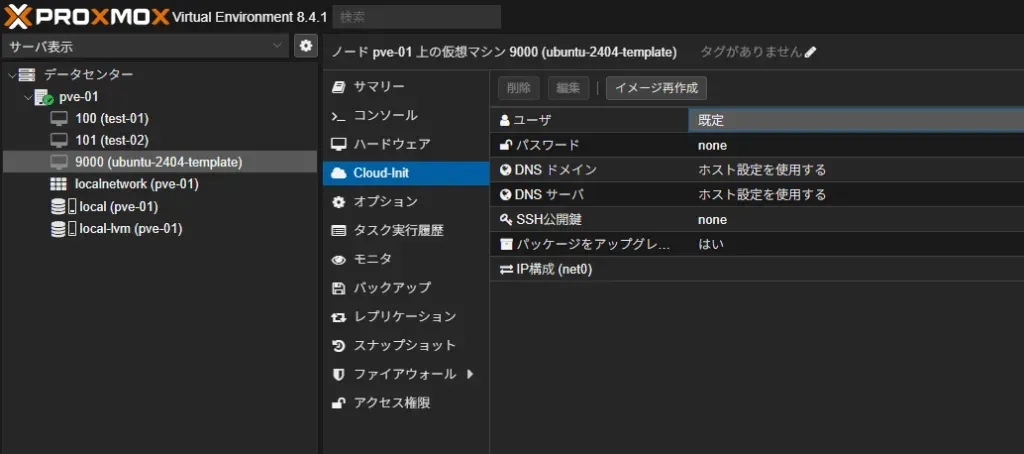
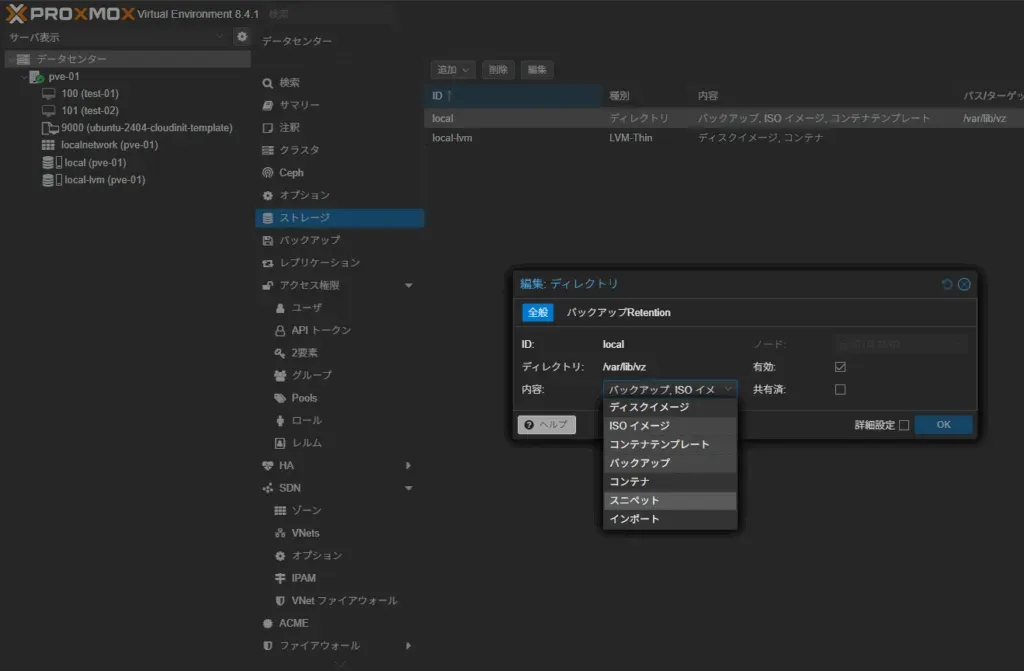
Settings to Upload Files
Do the following setting first to upload the cloud-init config. Click “Datacenter > Storage > local > Edit” and add snippets to content.
Doing this creates a snippets directory under /var/lib/vz, making contents referencable from proxmox.
Create cloud-init file
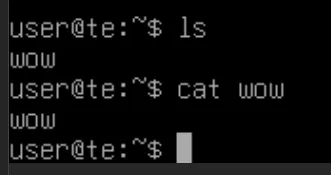
For now, let’s include something where execution result is easy to understand.
Ref: https://cloudinit.readthedocs.io/en/latest/reference/examples.html
write_files:- content: | wow path: /home/user/wowUpload cloud-init file
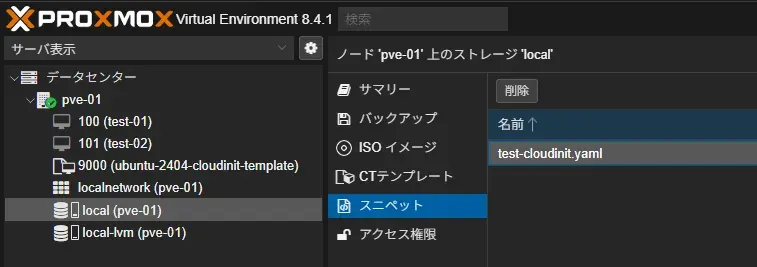
cat << EOF | sudo tee /var/lib/vz/snippets/test-cloudinit.yaml#cloud-configwrite_files:- content: | wow path: /home/user/wowEOFIf Snippet creation completed successfully, you should be able to check it on the page below. I feel it would be easy if I could upload on this page, but unfortunately, I couldn’t find an upload button…
Inject cloud-init settings into VM
Once up to here is done, inject cloud-init settings into the VM.
vmTemplateId=9000
# Settings doable in GUIsudo qm set ${vmTemplateId} --ciuser usersudo qm set ${vmTemplateId} --cipassword pwsudo qm set ${vmTemplateId} --ipconfig0 ip=dhcp,ip6=dhcp
# Custom settings (Please rewrite filename to what you created)qm set ${vmTemplateId} --cicustom "vendor=local:snippets/test-cloudinit.yaml"
Convert to Template
Convert the created VM to a template. Possible via GUI.

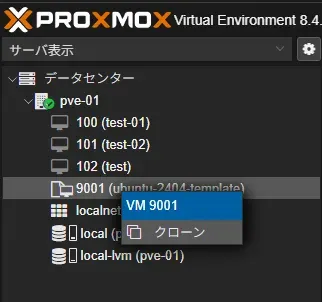
Create VM from Template
Create a clone from the template.
Conclusion
So, I roughly summarized the flow until making a template VM on Proxmox using Ubuntu 24.04 cloud image. Once used to it, it’s not that difficult work, but one often forgets detailed steps unexpectedly…
Going forward, I want to elaborate the cloud-init contents a bit more to be able to automate Kubernetes node creation to some extent. I might leave a memo on that area too if I feel like it.
So, I hope this becomes a reference for my future self and someone somewhere. Chan-chan.