In the previous article, I installed “Incus” locally. This is a follow-up where I try out Incus’s clustering feature. I’ll leave the installation steps to that article and focus only on the configuration differences related to initialization and clustering here.

>-
Steps to Add a Machine to the Cluster
- Install Incus on the main machine (bootstrap server)
- Initialize Incus on the main machine (bootstrap server)
- Generate a cluster join token on the main machine (bootstrap server)
- Install Incus on the machine to be added
- Initialize Incus on the machine to be added
Refer to the previous article for installation instructions. Here I will only cover the differences during initialization.
Initialize the Bootstrap Server
Ref: https://incus-ja.readthedocs.io/ja/latest/howto/cluster_form/#id2
sudo incus admin initConfigure the initial settings as follows:
- Would you like to use Incus clustering?: yes
- What IP address or DNS name should be used to reach this server?: The IP or DNS address reachable by other servers
- Are you joining an existing cluster?: no
Note: It is also possible to put an already-configured server into cluster mode. I won’t cover it here, but you can refer to the documentation.
Generate a Token on the Bootstrap Server
Enter the member name you plan to register during admin init as new_member_name. Copy the output token since you will need to enter it on the joining machine.
sudo incus cluster add <new_member_name>Initialize Incus on the Machine to Be Added
Ref: https://incus-ja.readthedocs.io/ja/latest/howto/cluster_form/#id5
When joining a machine to a cluster, configure the settings during initialization.
sudo incus admin initConfigure the initial settings as follows:
- Would you like to use Incus clustering?: yes
- What IP address or DNS name should be used to reach this server?: The IP or DNS address reachable by other servers
- Are you joining an existing cluster?: yes
- Please provide join token: The token generated in the previous step
- All existing data is lost when joining a cluster, continue? (yes/no) [default=no] yes
- Choose “source” property for storage pool “local”: Your preference
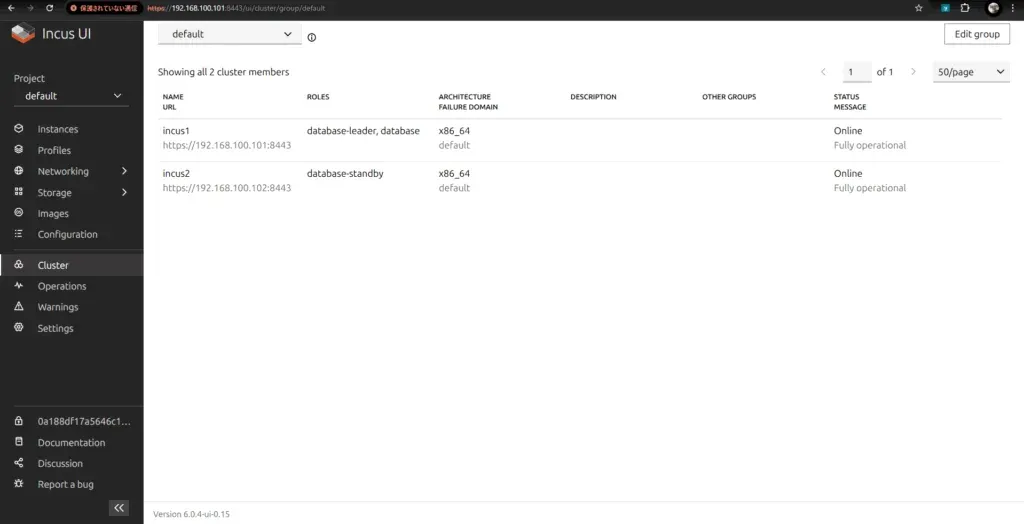
Verifying Cluster Membership
You can verify membership easily using either of the following methods. Success is confirmed when both the bootstrap server and the joined server appear in the output.
Verify via Command
sudo incus cluster list
+--------+------------------------------+------------------+--------------+----------------+-------------+--------+-------------------+|  NAME  |             URL              |      ROLES       | ARCHITECTURE | FAILURE DOMAIN | DESCRIPTION | STATUS |      MESSAGE      |+--------+------------------------------+------------------+--------------+----------------+-------------+--------+-------------------+| incus1 | https://192.168.100.101:8443 | database-leader  | x86_64       | default        |             | ONLINE | Fully operational ||        |                              | database         |              |                |             |        |                   |+--------+------------------------------+------------------+--------------+----------------+-------------+--------+-------------------+| incus2 | https://192.168.100.102:8443 | database-standby | x86_64       | default        |             | ONLINE | Fully operational |+--------+------------------------------+------------------+--------------+----------------+-------------+--------+-------------------+
Confirm via GUI
Conclusion
So, this time I roughly introduced the procedure to add a machine to a cluster in Incus. Before trying, I thought “Might be a bit difficult…”, but my impression is that it was surprisingly straightforward steps with few stumbling points.
Well then, I’ll write again loosely when I try something.