| Domain | Blog | Total | |
|---|---|---|---|
| Before | ¥2,000/year | ¥1,000/month (¥12,000/year) | ¥14,000/year |
| After | ¥1,800/year | ¥600/month (¥7,200/year) | ¥9,000/year |
Freedom
The second reason is operational freedom.
First, regarding domain management, Cloudflare offers a massive amount of features that can be enabled beyond just domain management. Even within the free tier that I’m using or planning to use, there are things like (forgive any semantic overlaps):
- Proxy features
- DNS
- CDN
- SSL/TLS
- DDoS Mitigation
- VPN-like things
- Authentication features
- Rule features (redirects, URL rewriting, etc.)
- Testing features (performance testing, etc.)
Currently, I use the Rule feature to redirect from the root domain to subdomains, enforce HTTPS, and set up various security measures. In the future, I plan to route connections for some subdomains to my home server, so the availability of VPN features and the ability to solidify security with access restrictions were deciding factors.
Next is the freedom of blog management, which probably goes without saying. With WordPress, you can use plugins and favorite templates, or write your own scripts to customize the look and functionality however you like. Since there’s an account management feature, you could potentially create a membership site or members-only content if you wanted to.
Tweaking Display Across Articles
With WordPress, plugins or scripts allow you to display tables of contents or ads at specified positions in all articles. This is close to “freedom,” but it’s such a huge merit that I’m putting it in its own category.
If you want to change the position or delete them, modifying or disabling the script applies the change to all articles. Being able to do this in bulk, compared to editing every single article one by one, is a very happy point.
In this blog, I place a table of contents before the first paragraph, and ads below the TOC and at the end of the article. Additionally, in the post list screen, in-feed ads are inserted after the 2nd and 6th articles, and changing parameters allows easy swapping of position and number.
Migration Process
Transfer from Onamae.com to Cloudflare
First, I transferred the domain. This isn’t difficult; Cloudflare has a transfer feature, so you just follow the instructions. From what I recall, I worked through the following steps. Note that around steps 5 and 6, the blog will become inaccessible for a bit, but it should be viewable again once Step 7 is complete.
- Invoke the domain transfer feature in Cloudflare.
- Disable Whois Proxy in Onamae.com.
- Get the AuthCode for domain transfer from Onamae.com.
- Enter the AuthCode in Cloudflare.
- Wait a bit, and an approval email for domain transfer comes from Onamae.com.
- Cancel Onamae.com.
- Set Hatena Blog’s nameserver in Cloudflare DNS (Make sure to specify DNS only at this time).
Selecting a Rental Server
Next, I chose a server to host WordPress. Due to usability issues and compatibility with Cloudflare, I tried a few during trial periods. I’ll omit which ones were good or bad, but I ultimately decided on Sakura Rental Server.
Here, I used a subdomain during selection. So the root domain pointed to Hatena Blog, and the subdomain pointed to the rental server. In this state, it’s possible to test while keeping the blog you plan to migrate running.
Migrating Articles from Hatena Blog to WordPress
Next, I migrated the articles to WordPress. Hatena Blog has a feature to export articles as a text file, so I used that. Importing the exported file into WordPress allows you to bulk import articles. However, issues like the following usually occur (they did in my case):
- Markdown articles are all output in HTML format.
- Fixed pages cannot be exported.
- Hatena-style shortcodes break completely (all mathematical formulas broke).
- Code display collapses completely.
I gave up on the ones that became HTML format, but I had to fix the rest. I had about 60 articles, but if you have a massive amount, this might be a bit daunting.
Note: When working, please configure settings to deny Google crawling or enable Basic Authentication on the server. Otherwise, articles under repair might appear in search results.
Customizing WordPress
Once this is done, it takes the shape of a blog, but I customized it further to my liking.
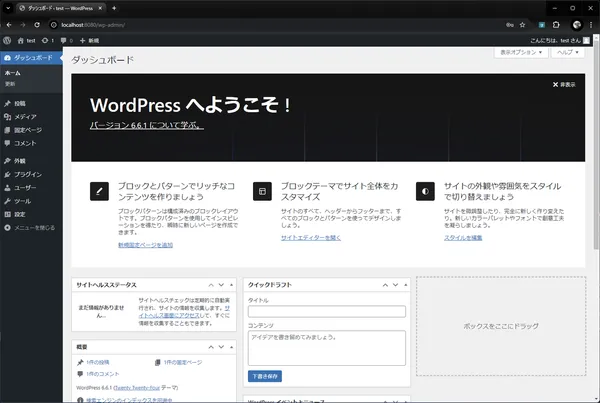
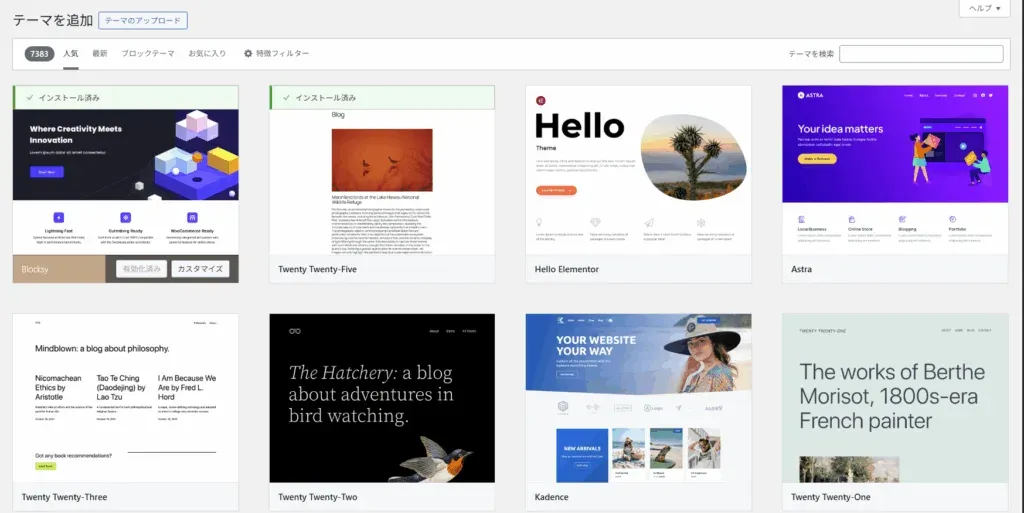
First, design. You can install themes from the WordPress dashboard (image below) or import files externally. Choose what you like.
I also installed security plugins, performance optimization plugins, and a table of contents plugin.
Work Around Ads
Once satisfied, I proceeded to publish. Specifically, I deleted the DNS settings for Hatena Blog and kept only the DNS settings for the new server.
Additionally, since I was migrating to a subdomain, I needed to migrate search value. So I set up redirects in Cloudflare and applied for migration in Search Console.
Impressions of Migration
If I were to give three impressions of the migration work, they would be: “Migrating articles was quite tedious,” “It took some time to get used to the WordPress post editor,” and “It’s easy to get stuck on domain stuff.”
Migrating Articles Was Quite Tedious
First, the story that “migrating articles was quite tedious.” I think it stems from using Hatena Blog’s unique features, but article display broke more than expected, so fixing it was a struggle. What even is Hatena notation…? I regretted not manually inserting MathJax CSS when writing formulas in Hatena Blog, even if it was a hassle.
There is a plugin to enable Hatena notation as shown below, but unfortunately, the last update was 12 years ago (probably unusable in the latest version).


Therefore, if you use Hatena notation and want to migrate, prepare yourself.
Besides that, as mentioned in the “Migrating Articles” section, various problems occur depending on the features you used. Basically, you have no choice but to fix them manually, so good luck (is all I can say…).
Took Time to Get Used to WordPress Post Editor
Next is that “it took some time to get used to the WordPress post editor.” WordPress uses a block editor called Gutenberg. When imported from Hatena Blog initially, the entire article is treated as one single block. So, you need to hit the “Convert to Blocks” button at the top of the editor right away. This turns the article into blocks per paragraph, allowing you to insert blocks between paragraphs.
I didn’t know this and wasted several hours. Please be careful.
Easy to Get Stuck on Domain Stuff
You can simply get stuck on DNS settings without knowledge. It felt better to remember what DNS is and the types of commonly used DNS records.
Also, probably due to Cloudflare or DNS settings, I experienced being unable to set SSL on the root domain on most servers. It might be my lack of knowledge, but it took a lot of time, so I’m leaving this here with the impression “It took a long time.”
There were various things like rental servers where if you can’t set SSL on the root domain, you can’t set SSL on subdomains either…
Conclusion
This time, I performed the (quite tedious) work of migrating domain management from Onamae.com to Cloudflare and blog management from Hatena Blog to WordPress. The time and effort for migration were significant, but I’m fully satisfied that I completed it.
If you have any questions or strictly want to consult about this migration work, please feel free to comment.
Also, if there are any parts where the display is broken due to migration, please let me know (desperately).