ComfyUIがStable Diffusion3に対応したので実際に画像を生成してみます。ついでにStable Diffusion3で画像を生成する手順も解説するので、自分も試してみたいなって方がいたら、是非読んでいってください。
Stable Diffusion3の仕組み周りや従来のモデルとの違いについては、以下の記事で軽く触れています。
Contents
作業の流れ
1. ComfyUIの導入と最新版へのアップデート
以下のどちらかの方法でComfyUIを導入します。導入済の方もComfyUIを最新版にアップデートしてください。
方法1:ComfyUIを直接導入する
初めての方はこちらで良いと思います。
otama-playground.com
方法2:StabilityMatrix(統合環境)経由でインストールする
2. モデルのダウンロード
リンク先から必要なモデルをダウンロードしてきます。ダウンロードしてきたモデルはそれぞれ記載のディレクトリに放り込みます。(StabilityMatrix使用の方は、それぞれ対応するディレクトリに読み替えて配置してください)
- MM-DiTのモデル ->
/ComfyUI/models/checkpointsに配置- sd3_medium.safetensors
- TextEncoderのモデル ->
/ComfyUI/models/clipに配置- clip_g.safetensors
- clip_l.safetensors
- t5xxl_fp16.safetensors(t5xxl_fp8_e4m3fn.safetensorsでも可)
3. ワークフローの読み込み
exampleとして提供されているワークフローを使用します。jsonをComfyUIの画面にドラッグアンドドロップすれば読み込まれるはずです。
(拡張が足りない場合はManager経由で適宜インストールしてください。)
4. 生成する
パラメータをいじってQueue Promptします。MMDiTもTextEncoderもパラメーターが多いので読み込みに少し時間がかかりますが気長に待ちます。
ModelSamplingSD3ノードのshift値- 論文の評価結果的には3.0か6.0にするのがよさそうです。
- ConditioningSetTimeStepRangeの値
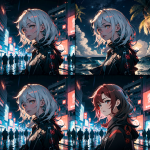
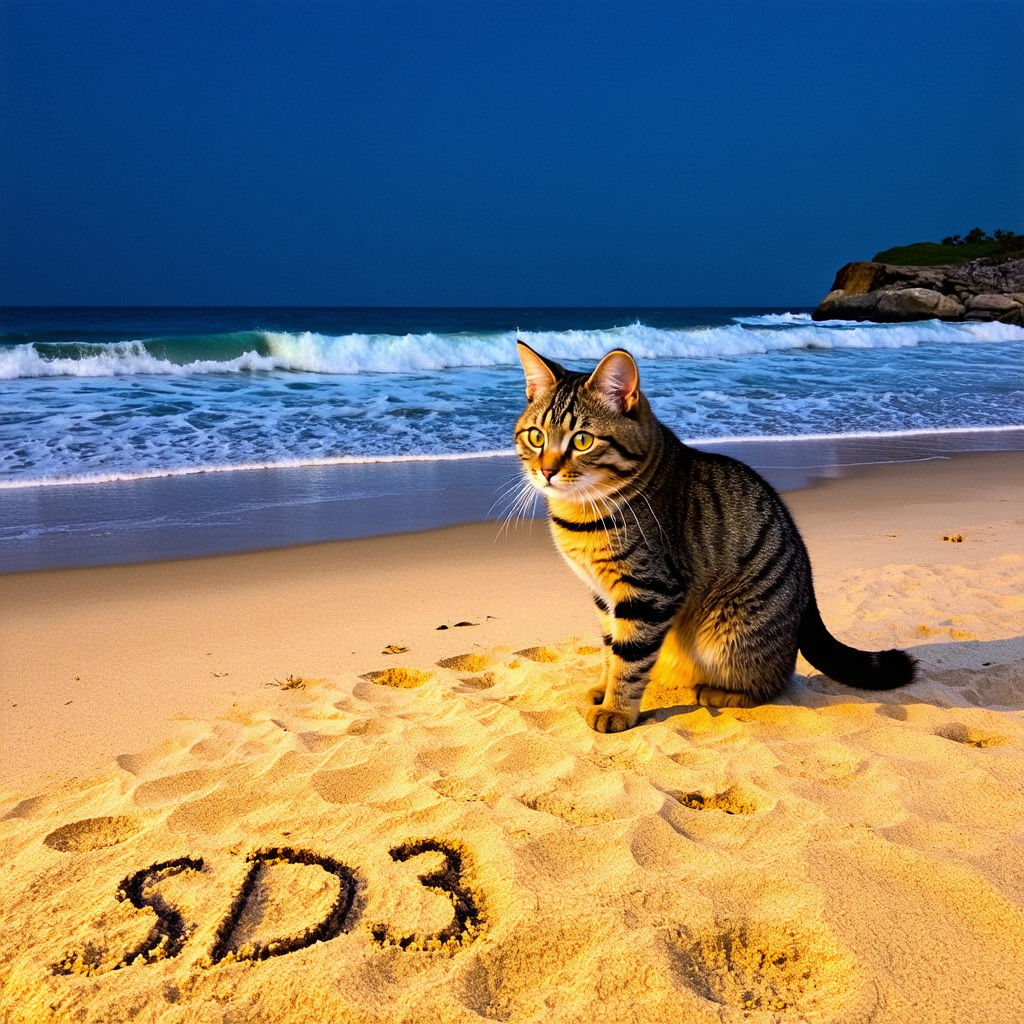
生成結果
sd3_medium_example_workflow_basic.json
positive
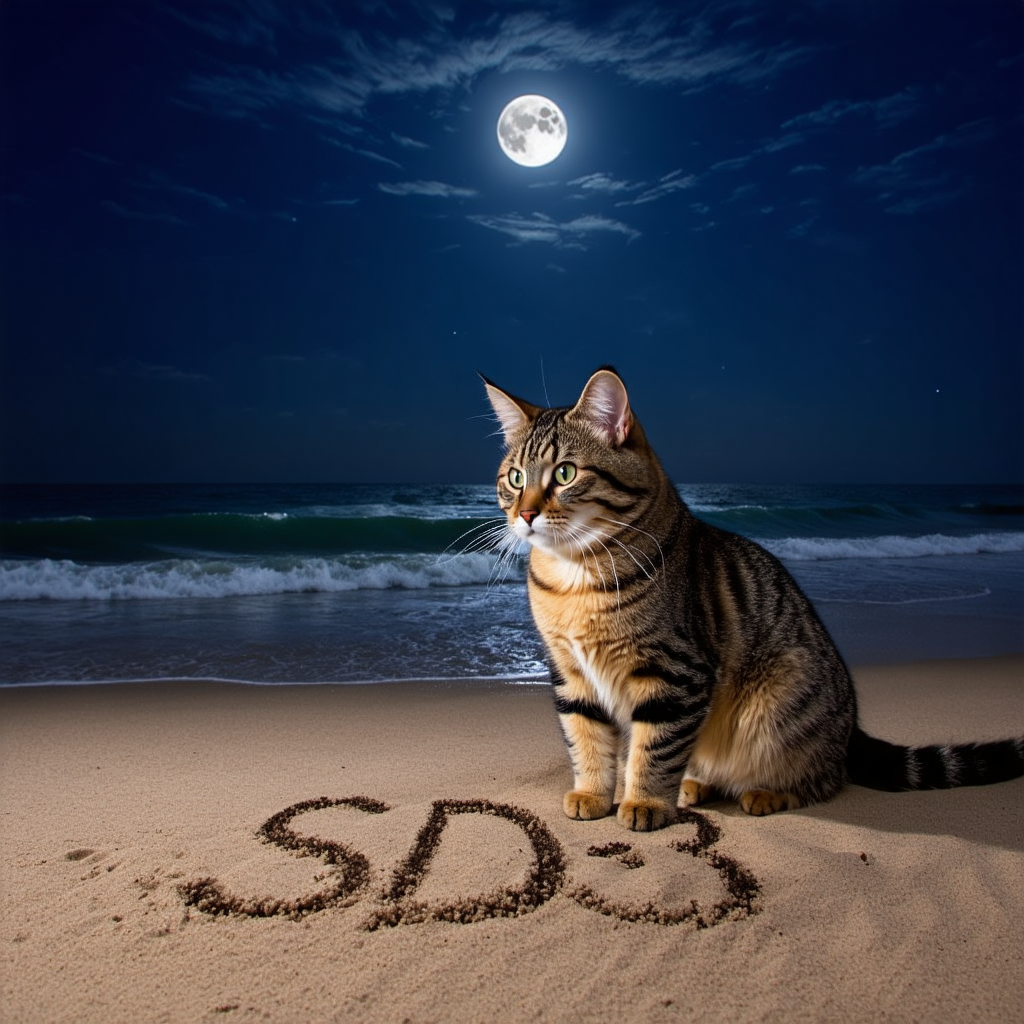
A photo of a cat on the beach at night. The words ‘SD3’ are written on the sand. Moonlight shines brightly, casting a mystical glow over the scene. There are wisps of clouds in the sky, adding to the ethereal atmosphere. The cat is looking towards the ocean, and the waves gently lap at the shore. The entire scene feels magical and serene.
negative
blurry, low quality, distorted, unnatural, oversaturated
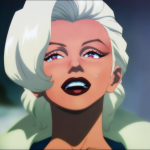
sd3_medium_example_workflow_multi_prompt.json
3つのText Encoderに別々のプロンプトを入れることができます
- clip-l(CLIP-ViT/L)
- 検索や分類に強いモデル
- 従来のカンマ区切りで入力すれば良いはず
- clip-g(OpenCLIP-ViT/G)
- CLIPのオープンソースバージョン
- 強味はCLIPと同様
- t5xxl(T5-xxl)
- 自然言語処理に強い
- こちらは文章プロンプトが良さそう
先ほどのプロンプトを3分割して入力してみました。
positive(clip-l)
Moonlight shines brightly, casting a mystical glow over the scene. There are wisps of clouds in the sky, adding to the ethereal atmosphere.
positive(clip-g)
The cat is looking towards the ocean, and the waves gently lap at the shore. The entire scene feels magical and serene.
t5xxl
A photo of a cat on the beach at night. The words ‘SD3’ are written on the sand.
T5だけ次元が大きいからなのかT5に入力したプロンプトが強く出ていそうです。
sd3_medium_example_workflow_upscaling.json
生成結果にSD Upscaleをかけるワークフローです。2048×2048の画像が生成できます。
最後に
生成速度や文字生成の精度など気になるところはありながらも、全体的な精度はよくなっていそうです。これからファインチューニングされたモデルやLoRAなどのモデル拡張が出てくると思うので楽しみに待ちたいと思います。
従来のモデルでLoRAなどのテクニックを試してみたい方は下記のリンク集をぜひご活用ください。